Developer Support
How to Set Up and Manage Webhooks
5 min read
·
Last updated on Jan 26, 2023
Webhooks listen to events in real-time so that we can notify you whenever something happens in your app or on a site that your app's installed on. Here are some examples:
- App events: when a user adds or removes your app, makes an in-app purchase, or upgrades to a premium plan.
- Site events: when a contact is created/updated in the user’s site, or when a site visitor performs an action in the site, like a purchase.
How it works
When you register for webhooks, Wix sends an HTTPS POST request to your server's callback URL with the relevant event data. When you receive this data you need to verify its signature to make sure that it was sent by Wix.
Keep in mind:
Keep in mind:
- We can’t guarantee that you’ll receive messages immediately or in the right order: when we detect an event delivery failure, we’ll attempt to deliver the event to your app again for 48 hours from the time the event occurred. However, you might not receive messages in the order in which they occurred.
- Make sure your app can handle receiving the same event more than once: we store copies of your app events on multiple servers for redundancy and high availability. On rare occasions, one of the servers storing a copy might be unavailable when you receive the event. The copy won’t be deleted from the unavailable server, so you might receive the same event more than once.
Important:
Webhook receivers should be idempotent.
Register for webhooks
If you want to set up webhooks for events that occur on users' sites, you first need to add some permissions (this is how a user grants access to that data).
- Open your app in the Wix Developers Center.
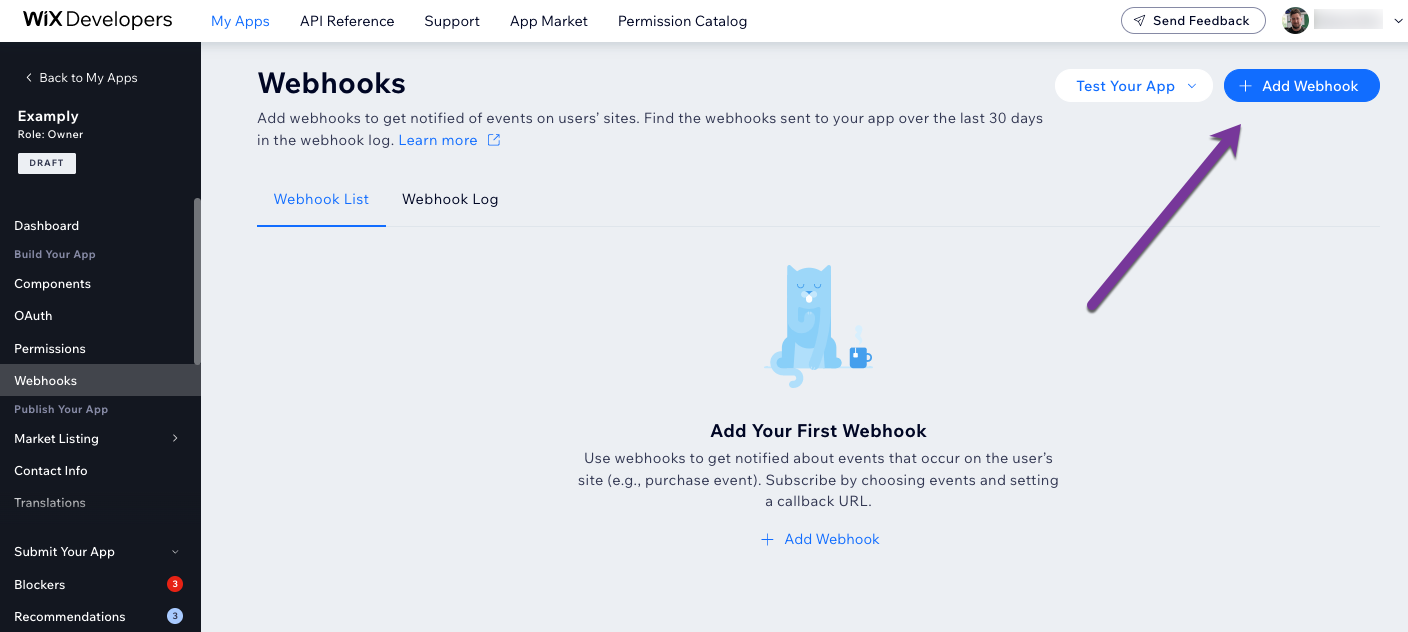
- Go to Webhooks in the side menu (under Build Your App).
- Click + Add Webhook.

- Select an API Category (e.g. Wix Stores)
- Choose Webhook Event from the available options (e.g., Cart abandoned).
- Enter a Callback URL (this is where we send the event when it occurs).
- Click Save.
- Click Test to send an example webhook and check that you receive it. Need a temporary callback URL? Check out this site.
- In addition to the example webhook you should also test some real scenarios.
- Make note of your Public Key – this is how you verify the signature in any webhook you receive (this appears once you've added a webhook).
Webhook payload
When a relevant event occurs in a webhook you're subscribed to, we send an HTTPS POST request with the event’s data to the callback URL. The event’s data is included in the body of the request as a JSON Web Token (JWT).
The data received varies by event type, but the following is always included:
The data received varies by event type, but the following is always included:
- instanceId: the App Instance ID is a unique identifier of the app within the website.
- eventType: a description of the event type, e.g., OrderEvent.
Webhook payloads
Webhook payloads only include basic event data. You can get all the available event data using relevant APIs. E.g., when a user installs your app.
Verify the signature
Verify the signature for each webhook to check that it was sent by Wix. Here's how.
Public Key
You need your app’s Public Key which you can find in the Wix Developers Center. This key is unique to your app and doesn’t change.
Cross-checking webhooks
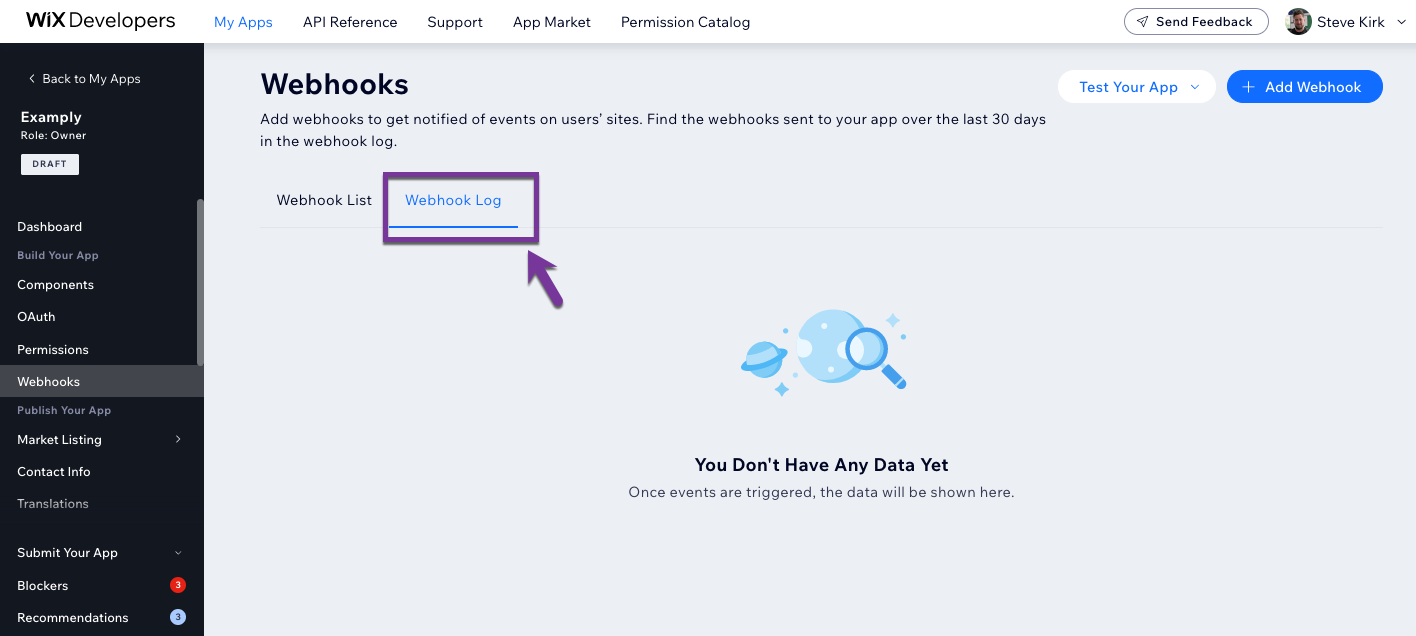
You can see a list of all webhooks sent to your servers in the Webhook Log tab in the Wix Developers Center. This is where you should check if you think you might have missed any webhooks.

Resend policy
If a webhook fails and a 500 status code, a timeout error (1250 ms), or an unknown error is received, we'll make up to 12 additional attempts to send it to you, using the following retry schedule:
Attempt | Time |
|---|---|
Attempt 1 | 1 minute after initial failure |
Attempt 2 | 10 minutes after previous failure |
Attempt 3 | 1 hour after previous failure |
Attempt 4 | 2 hours after previous failure |
Attempt 5 | 2 hours after previous failure |
Attempt 6 | 2 hours after previous failure |
Attempt 7 | 4 hours after previous failure |
Attempt 8 | 4 hours after previous failure |
Attempt 9 | 4 hours after previous failure |
Attempt 10 | 8 hours after previous failure |
Attempt 11 | 8 hours after previous failure |
Attempt 12 | 12 hours after previous failure |
Note:
A webhook that's being resent will not affect any subsequent webhooks for the same endpoint. This means that you may receive an "old" webhook that required a resend after a later webhook that was sent successfully on the first try.
Manage webhook versions
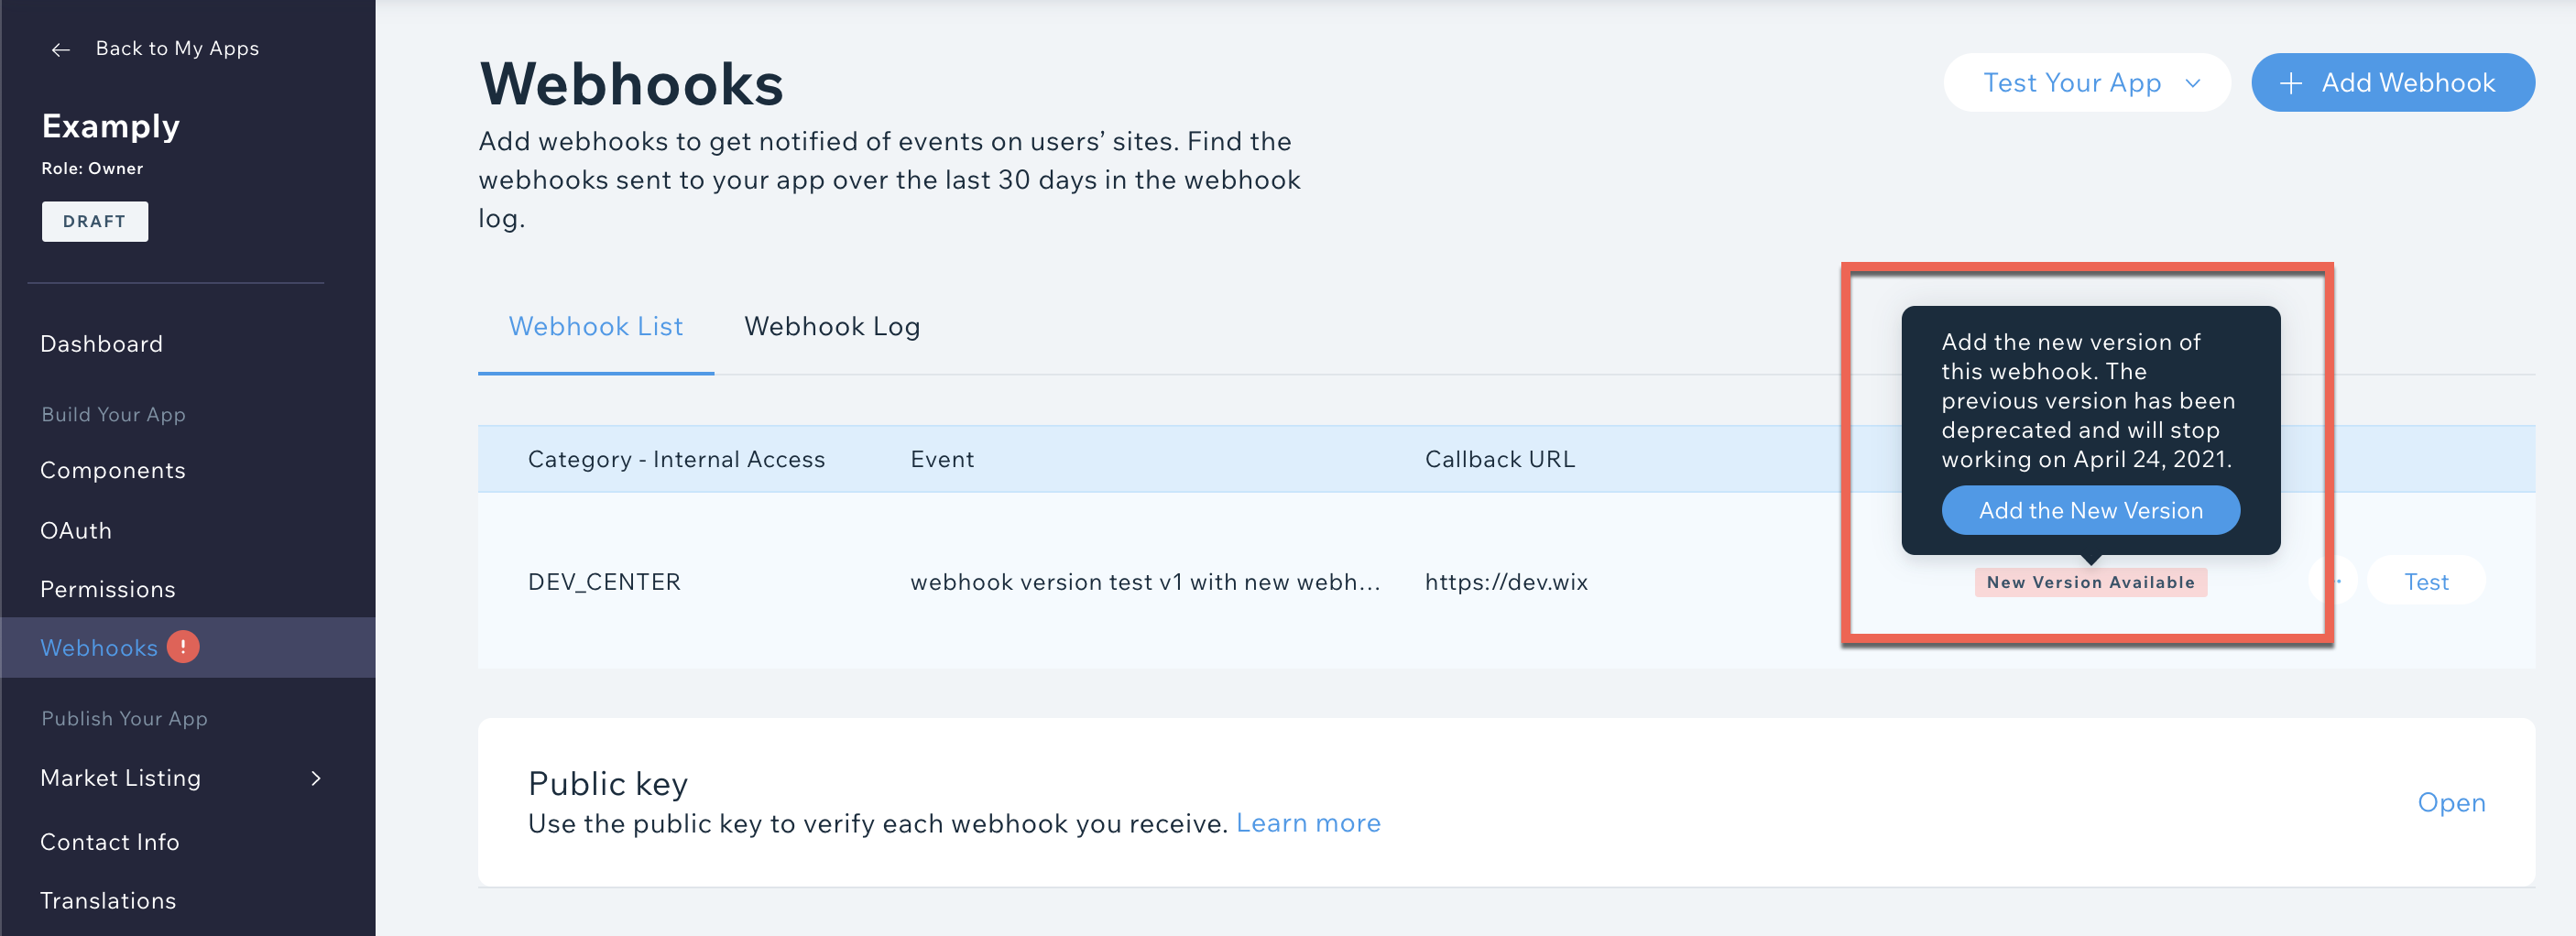
When a new webhook version is available you can see and update it in Wix Developers Center under the Webhooks tab.
We strongly recommend updating your webhooks as soon as you can to get the latest, most relevant information. In some cases, outdated webhooks can also stop apps from working correctly.
Here's how to get the latest version:
- Go to the Wix Developers Center and click the Webhooks tab.
- Hover over the New Version Available prompt next to the Webhook.
- Click Add the New Version.

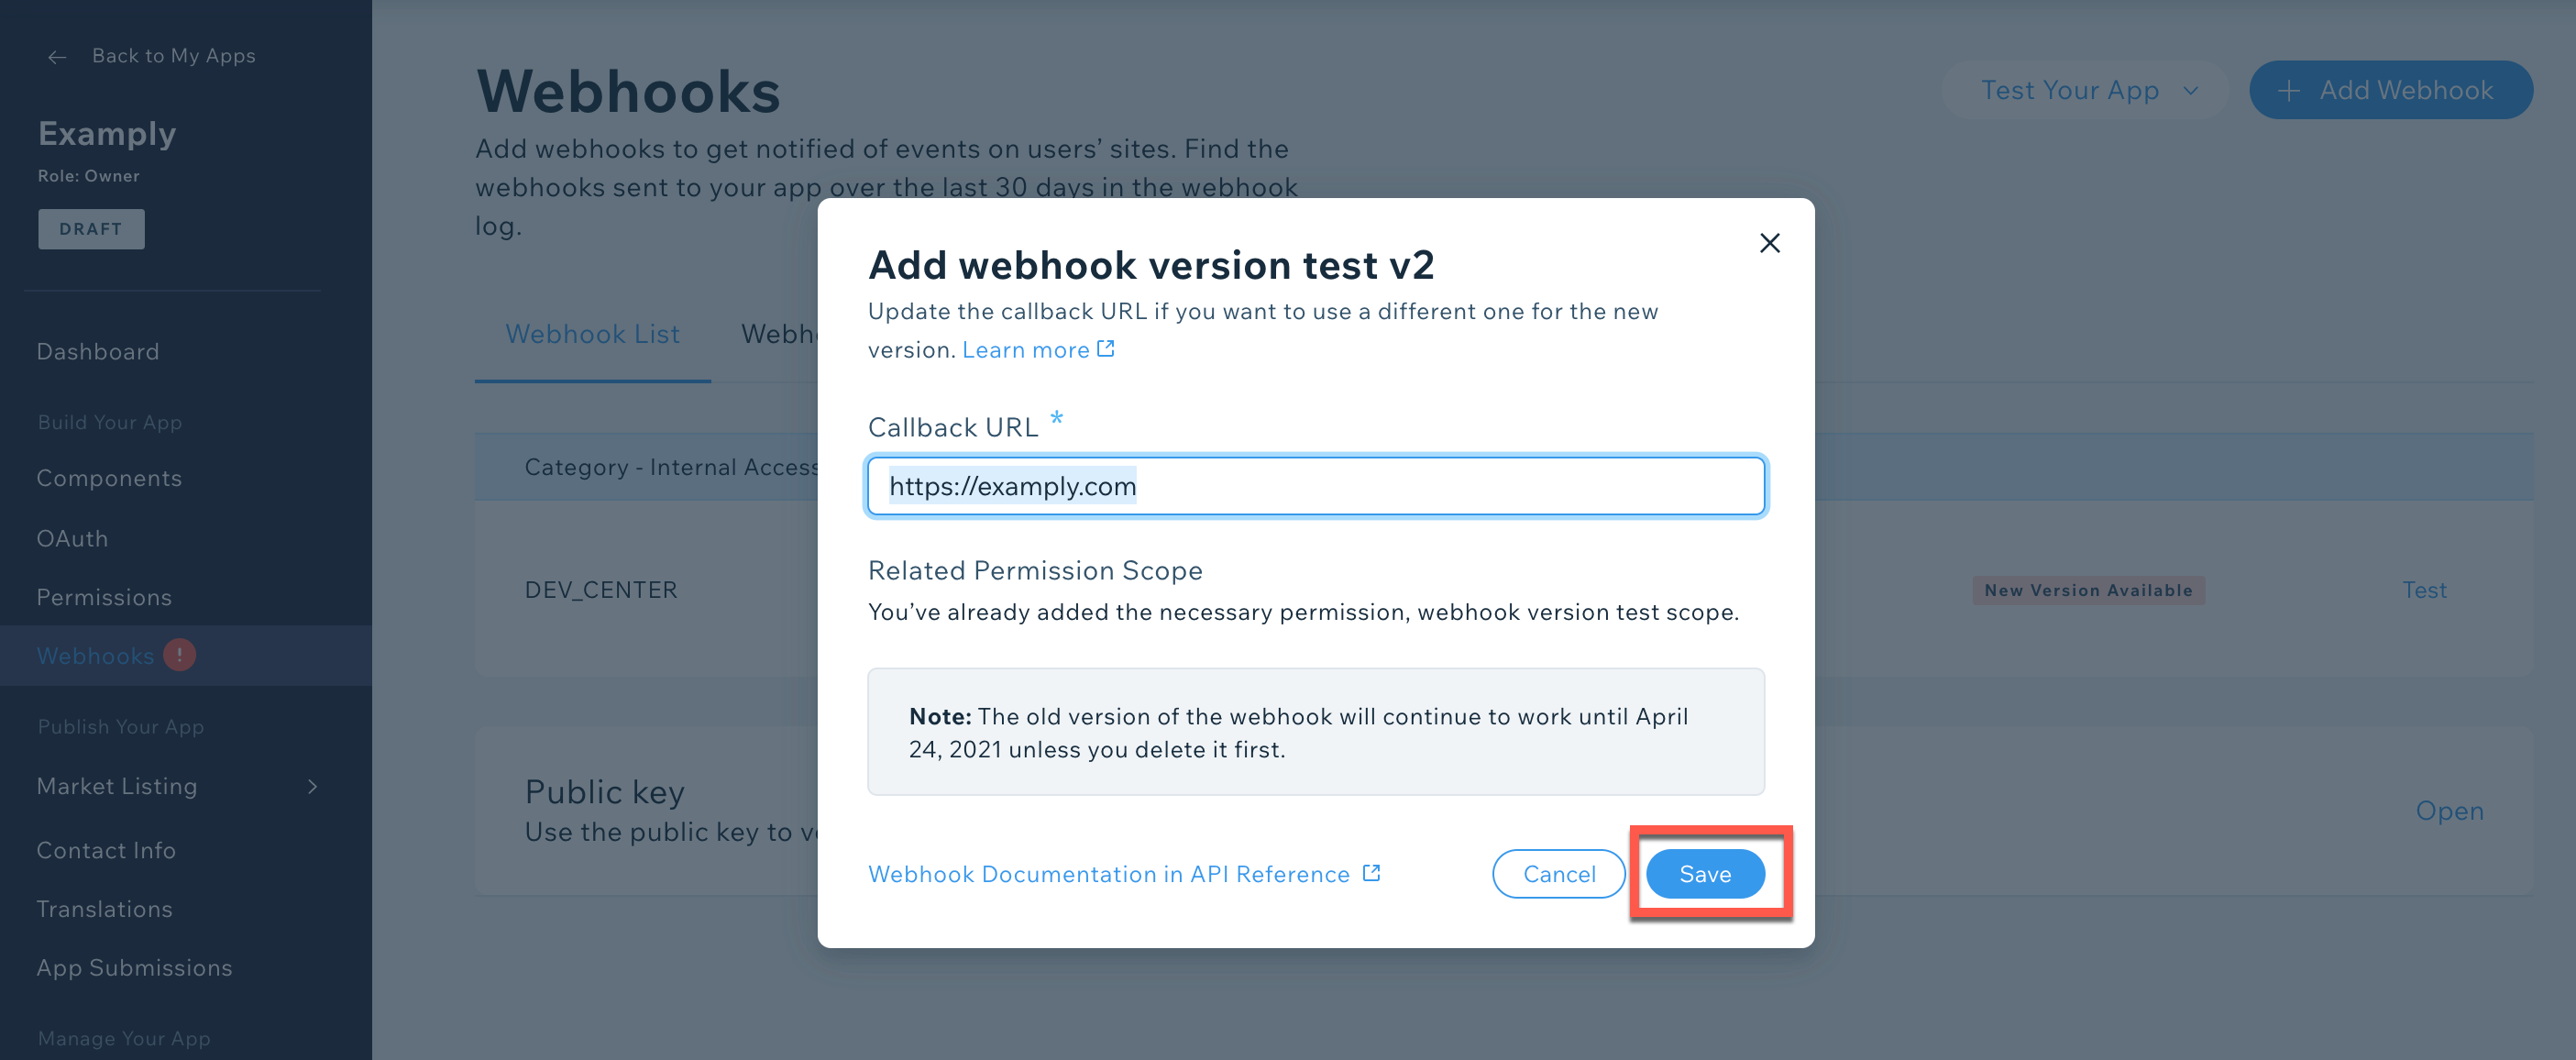
4. Edit the Callback URL if you want to use a different one and choose the permission it requires. If you require a permission you didn't already have, you need to resubmit your app for review.
Important:
Your original Callback URL will continue to receive events from the older webhook until it's deprecated (we give you plenty of notice before this happens), or you delete the old webhook version.
5. Click Save.

6. Integrate the new webhook version into your app's code (the new webhook won't work fully until you've updated this).
7. Delete the old webhook version when your code fully supports the new one.
Tip:
It's good practice to regularly review your webhooks, even if you aren't prompted to update. Webhooks are often added and updated in the API Reference, so there might be one available more suited to your app's needs.
Was this article helpful?
